A group of home bakers helping each other to achieve perfection.
Baking a home made Baking a homemade bread, cake or cookies will give the best outcome. However in order to achieve the best results, a perfect recipe and right techniques are required.
We are a small group of home baker friends, who love and want to learn more about the nook and corners of baking. We are planning to try out recipes from books/magazines and cooking shows. Every member gets a chance to present their choice of recipe and share important points with the rest of the group.
Main purpose of this group is to learn the techniques, critic the procedure if there are ways to improve, and to eat a delicious food.
Rules are simple, we will choose one recipe and send it out to the group by 16th of every month and the reveal date will be 15th of the next month. On that day we will blog about it. A linky tool will be open during that time and each member can link their post.
First month we are going to do a recipe, 2nd and 3rd month will be a theme and the 4th month we will be back at a recipe. By doing in between recipes, we will able to learn more.
All enthusiastic bloggers interested in baking are welcome, please email Swathi of Zesty South Indian Kitchenat favoriterecipes12@gmail.com.
We will appreciate the use of logo or worded link that will help to spread the word. A bunch of thanks to Tina for designing this beautiful logo
If you want to make it a gluten or vegan free diet, you can do those modifications also.
Polpette was on my to do list ever since i borrowed the book from the library. but life kept interfering and it wasn't till last Friday that I could get it done. and then i realized that i could have cooked this up on any other weeknight... it was so simple and so easy.... and so DELICIOUS. we all loved it. and by all i mean even my little toddler....
though polpette is supposed to be shaped like meatballs... i simply cooked my chicken mixture in a casserole and sliced out individual pieces and served it with Annie's Noms' Caramelised onion mashed potato and baked Kale chips. the mashed potato was yummy and the three tasted really good together. however Nishi and i both felt that the chicken tasted even better on Monday when we had the leftovers with our Indian meal of Rajma-Chawal (Rice with Red Kidney Bean Curry). don't know if the chicken became more delicious with a two days of refrigeration or it was the combination... but we definitely relished it more on Monday.. now over to the recipe.
for the Kale chips
i used the following ingredients
1/2 bunch kale
1 tablespoon olive oil
1/2 teaspoon onion powder
salt and black pepper to taste
and proceeded as follows..
I preheated the oven to 350 degrees F, cut the leaves from the ribs, washed and dried them and chopped them into 1 inch pieces. i then drizzled it with olive oil and the seasoning and baked it for 10-12 minutes.
for the Chicken Polpette
i used the following ingredients
1 cup milk
6 inches from a loaf of french bread (I used French bread because that is what i had.)
4 pieces of tender chicken(marinated overnight and cut into small pieces)
3 tablespoons of dry parsley leaf
1/2 cup grated Parmesan cheese
1/2 cup finely chopped onion
2 cloves of garlic, finely grated
1 egg, lightly beaten
2 tablespoons of Cooking Marsala Wine
10 Kalamata olives, halved length-wise
1/2 cup Italian bread crumbs
salt and pepper to taste
marinade for the chicken 1 tablespoon ginger-garlic paste 1 tablespoon vinegar 2 teaspoons hot pepper sauce 2 teaspoons Worcestershire sauce 1/4 teaspoon salt
and proceeded as follows...
the night before i cooked the dish I cleaned and chopped the chicken tenders into 1 inch pieces,
whisked the ingredients of the marinade, pour it into a resealable plastic bag and added chicken pieces coating them evenly with the marinade. then sealing the bag i marinate the chicken in the refrigerator for over 24 hours.
i preheated the oven to 350 degree F.
next, i heated the milk until warm and placed strips of the bread in the warm milk till they absorbed the milk completely. this hardly took any time. maybe a few seconds. i then transferred the bread strips to a board and finely chopped them and placed them in a large bowl.
once that was done, i added the rest of the ingredients to the pieces of soaked bread and hand-mixed them till they combined completely. then transferring the mixture to an oval casserole dish, i baked it for 20-25 minutes. and after letting it rest in the oven for an additional 10 minutes i served it for dinner....
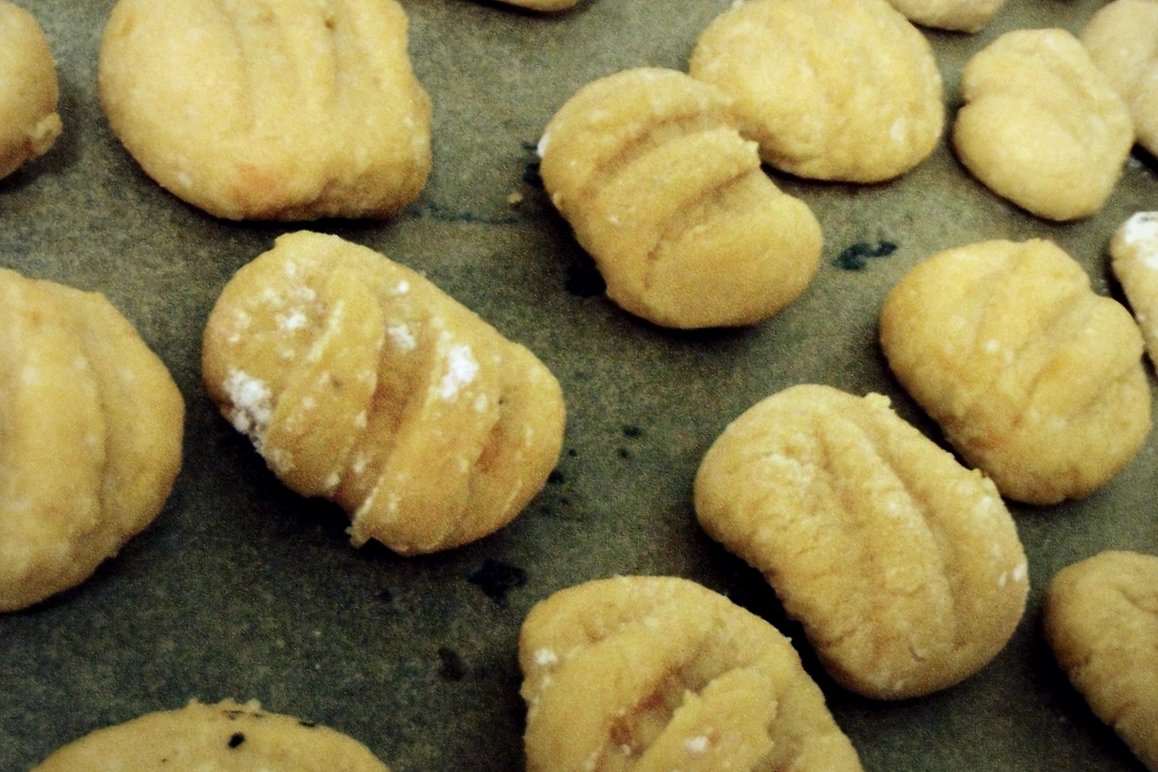
Never in my life had i imagined that i would make gnocchi at home. but the introductory note in the book said that "homemade gnocchi is very simple" and is 'one of the first cooking projects that the author involved are kids in.' so i thought... o.k. lets give it a try. and yes. few hours later i realized this is that making gnocchi is indeed that easy... once you have got the hang of it.
Taste wise, my sweet potato dumplings did not come out 'as light as clouds,' as the book described them to be. clearly there was plenty of scope for improvement of the texture of my gnocchi. but since it was my first attempt we tried overlooking that and concentrated more on the the creamy red pepper sauce that i tossed it in. the sauce was finger-licking delicious. and there was an immediate request for its inclusion in the next weeks menu.
since there was no green in the gnocchi and sauce, to add color to the plate i served it with baked kale chips. and the two paired pretty well. also, just for curiosity i tossed few dumplings in store-brought ragu... that too tasted good and according to Nishi the potato taste of the dumplings was somewhat more identifiable in the ragu tossed ones. however i liked the gnocchi tossed in red pepper sauce more. i could faintly taste the paneer in it and i really enjoyed that. now over to the recipe....
To make the Sweet Potato Gnocchi with Creamy Red Pepper Sauce,
i used the following ingredients
homemade sweet potato gnocchi (as prepared below)
the red pepper sauce (as prepared below)
for the garnish
1/2 teaspoon ground cinnamon
1/4 teaspoon ground nutmeg
1 tablespoon pine nuts
and proceeded as follows....
I boiled water in a large saucepan with a generous amount of salt, dropped about 10-12 gnocchi into the water at a time and cooked them until they returned to float on the surface of the boiling water. 2 to 3 minutes. i then removed them with a slotted spoon and tossed them immediately with the prepared sauce. then garnished it with ground cinnamon, nutmeg and pine nuts.
though i mentioned Lucinda's Rustic Kitchen in the beginning, i adapted my recipe of gnocchi from Oh My Veggies. and for the sauce i used this recipe as a guideline.
For the sweet potato gnocchi
the ingredients and what i did
2 1-pound red-skinned sweet potatoes, rinsed, patted dry, pierced all over with fork
1/4 cup homemade paneer
1/4 cup pureed tofu
1/2 c. shredded parmesan cheese
1 tsp. salt
a pinch of brown sugar
about 1 1/4 cups all-purpose flour + more for rolling and shaping gnocchi
i preheated the oven to 425 degree F, speared the potatoes lightly with a fork in a few places and directly placed them on the oven rack and cooked until completely tender, about one hour. when cool to handle, i cut the potatoes open, scooped out the flesh and mashed it with my masher, then spread them out on a baking sheet and allowed them to cool completely.
next in a bowl i blended the mashed potato with all the listed ingredients other than flour. then slowly blended in the flour into the mixture adding 2-3 tablespoons of flour at a time, until the dough pulled away from my hands and felt like pizza dough.
next i sprinkled some flour on a work surface, separated the dough into several pieces and rolled each out into around 1 1/2 feet long ropes andusing a knife cut each rope into 18 one inch pieces.
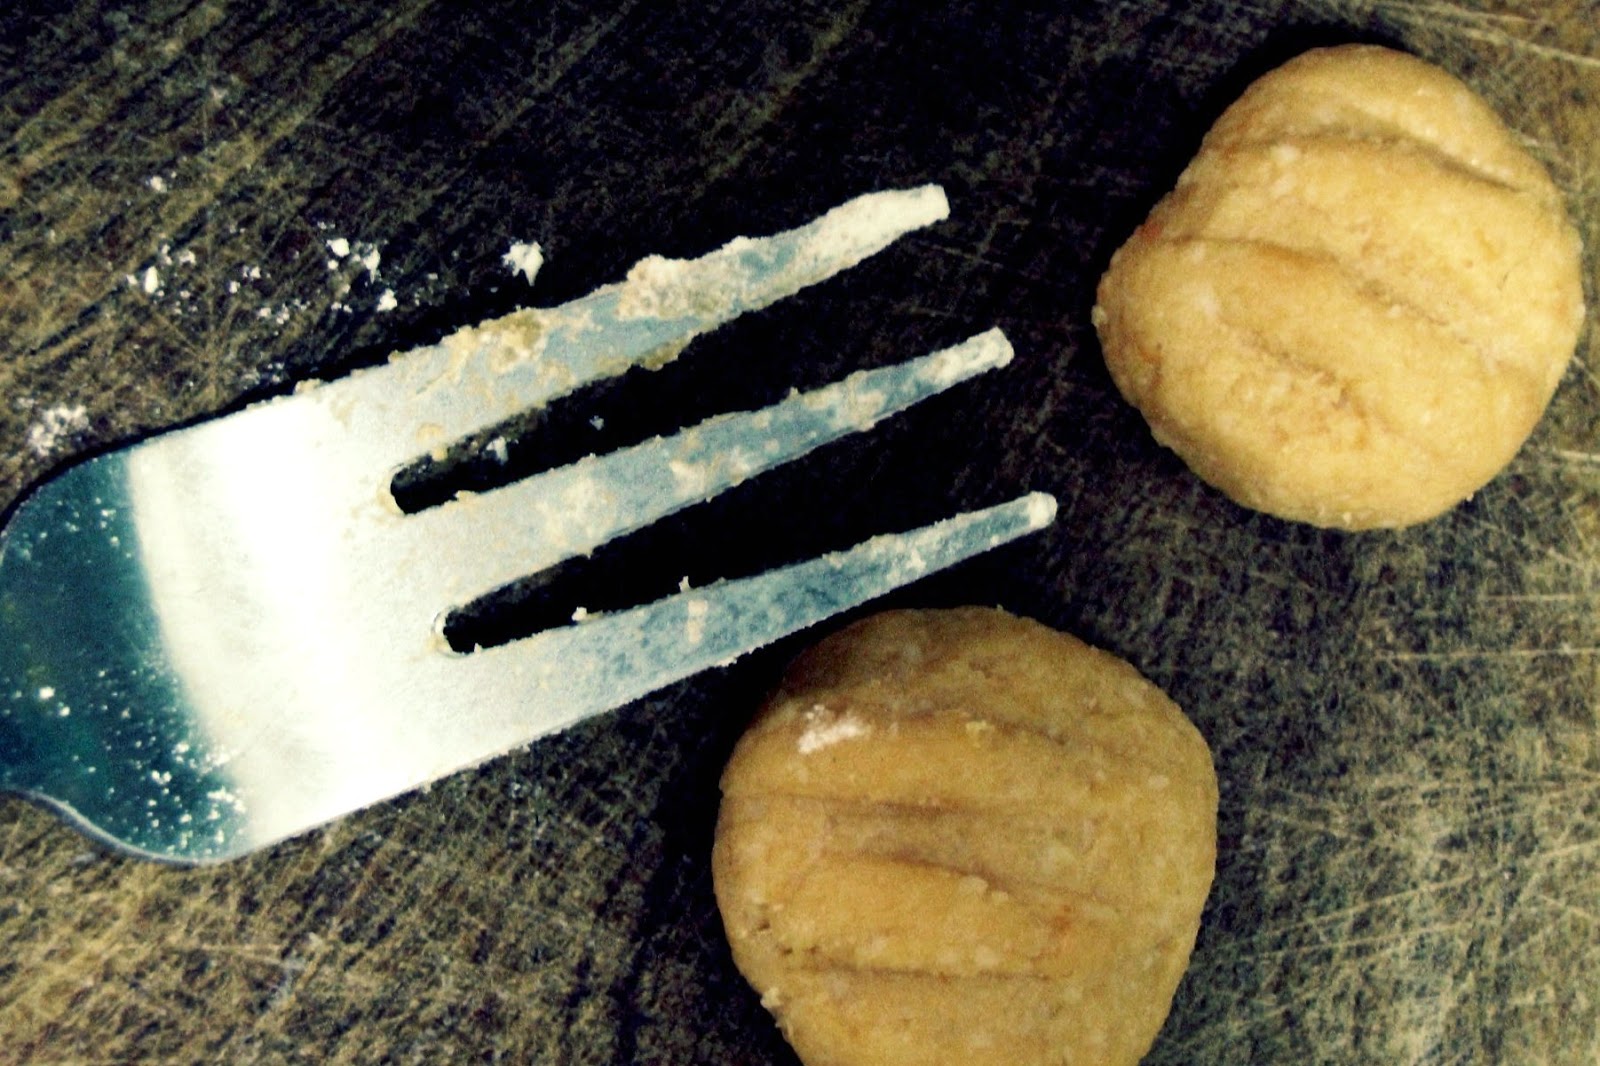
up to this point i followed the instructions in the recipes.. but then they became confusing. the book said " To form the gnocchi, dip a fork in flour, then place the tines on top of a piece of dough. Applying medium pressure, gently roll the gnocchi toward you with the fork, releasing pressure gradually as you roll, until it is completely rolled off the tines. Repeat with each piece of dough, placing the gnocchi on a floured baking sheet as completed. The pieces should resemble tiny footballs with a cup in the center," and the recipe i was following said something similar. and though theseinstructions make complete sense now... that night they didn't. so i googled and this video came to my rescue.
and viola !! using the tips from the video i got my first batch of gnocchi. yay !!
immediately afterwards, i spread the dumplings on a sheet of parchment paper, covered them loosely with a plastic sheet and froze them to use later.
For the red pepper sauce
the ingredients and what i did.
1 medium sized red pepper
1 medium sized onion
2 cloves of garlic, minces
1 medium sized potato, peeled and boiled
1/2 cup milk
2 tablespoon Greek yogurt
1 tablespoon butter
1 tablespoons + 6 teaspoons olive oil
1 teaspoon capers
2 tablespoons dried parsley
3 tablespoons dried basil
salt to taste
black pepper to taste
sugar to taste
i preheated the oven to 425 degree F, then cut the red pepper and half of the onion in thin stripes and along the minced garlic and 1 tablespoon of olive oil, wrapped them in an aluminium foil and baked them for 15 minutes.
next i sliced the remaining onion into thin stripes and fried it in butter over medium heat until it was soft and light brown. then i added milk to this and when the milk started simmering i stirred in the mashed potato, baked red pepper-onion mixture and capers into it and heated it for about 5 minutes stirring occasionally. i then transferred the mixture into the blender and pureed it along with Greek yogurt, salt, pepper, sugar, basil and parsley. then whipped the mixture while gradually adding the remaining olive oil into it until it achieved the creamy consistency that i wanted in my sauce.
so that is what i indulged in over the weekend... i certainly look forward to making more of this in the recent future... what about you? have you tried your hands at gnocchi... do you have any tips to share. do drop in a line... i'll love to hear....
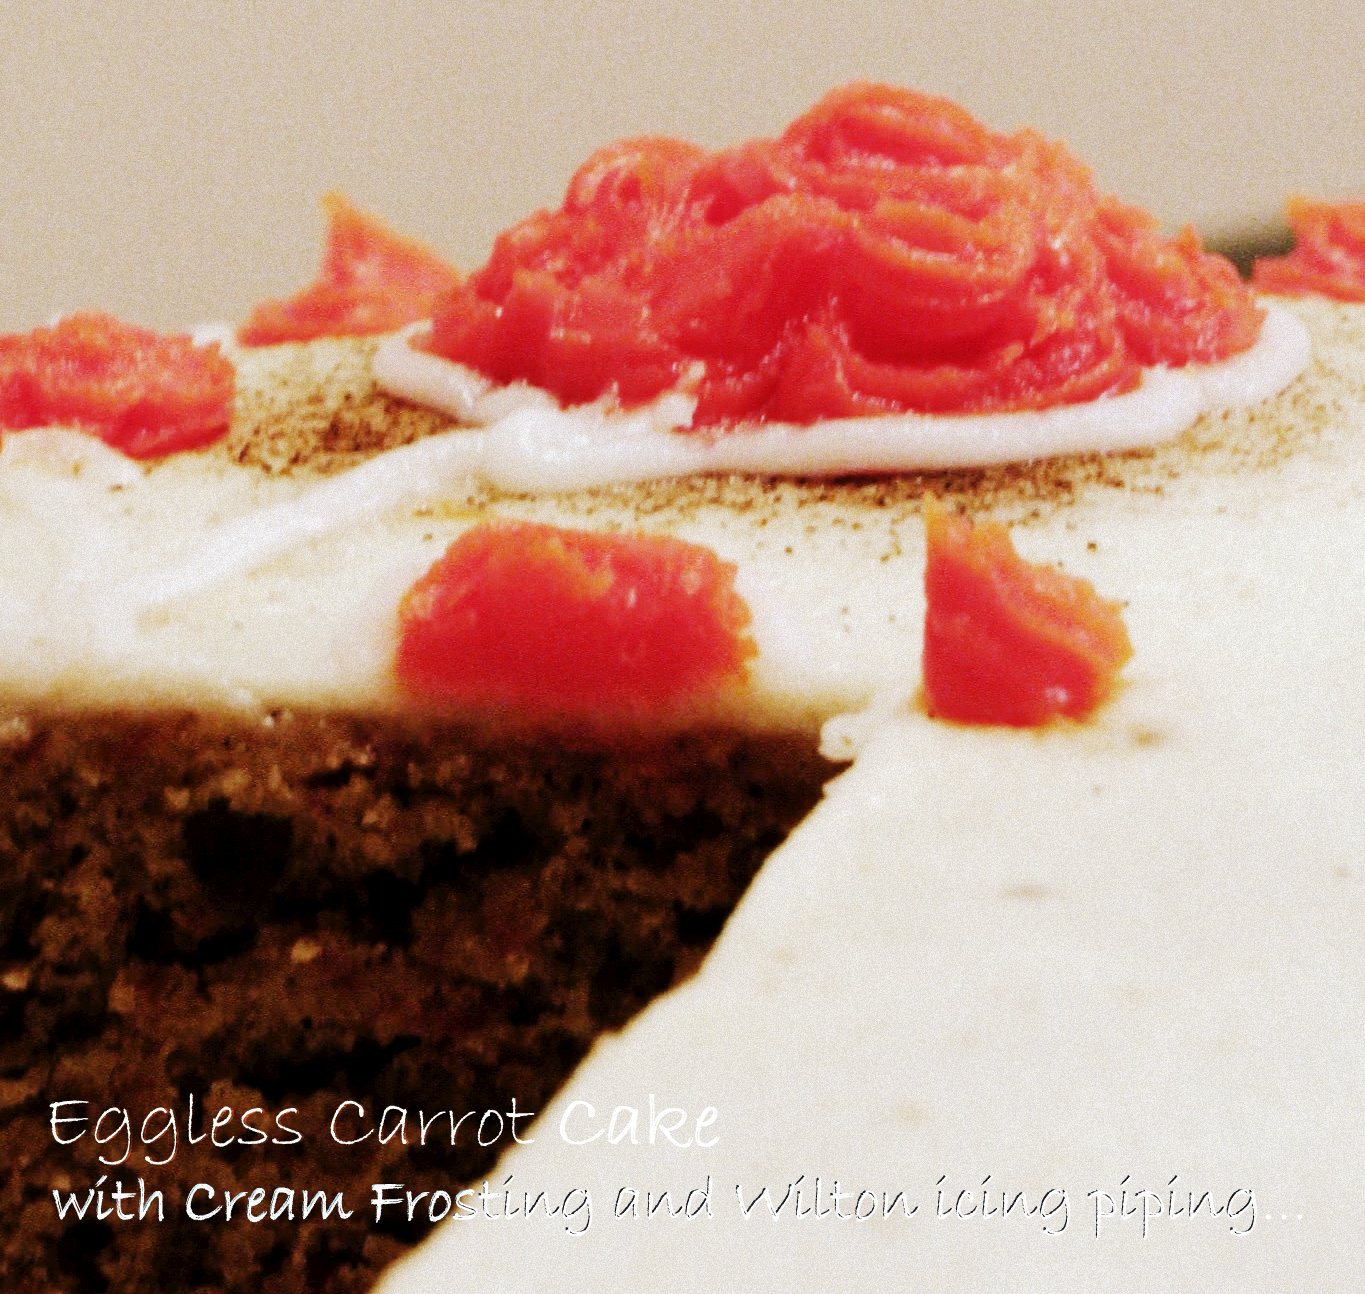
Its been 3 years since I have been baking cakes. before Pradyot was born I used to bake a cake or a batch of muffins every Saturday. but things changed after he was born. during the first few months after his birth while my parents were still here i managed continuing with the weekly ritual. but once they left i found it almost impossible to meet the task. nevertheless for Pradyot's first birthday i wanted to bake the cake. and it was then that i realized that though i hadn't completely lost my cake-baking skills, there was a good deal of decorating skills that i had yet to pick up. so i decided on a self improvement project
A Cake A Week.
As the name suggests, as part of this I'll be baking a cake every week, decorating it as best as i can and post its picture on Saturday, giving links to the recipe i followed and the guiding tutorials on cake decorating that i found useful. Herein I welcome your suggestions on eggless cake recipes that have worked for you and online cake decorating tutorials that you have found useful. and in case you are a novice who is just as enthusiastic to work on her skills i would love to team up and work on this project together. simply drop in a line and from next time we can decide on the recipe and tips to follow and link each other up.
Well I have been following her blog and loving her recipes for the past three years. so obviously my first bake had to be from there. I followed her recipe word to word except for the fact that mine was not a vegan one. I used 1% milk instead of almond milk and for the frosting I used a whipped cream( 1 cup heavy cream whipped with 1/4 cup sugar) and Wilton's Ready to Use Decorating Icing Tube. For the tips on decorating, i followed the instructions that i had seen in a youtube video sometime back. but i had not pinned it so i cannot give the link this time. but i'll definitely do that from next week.
Hope you had a good start to your weekend. Around here we started by cooking up a delicious Italian dinner. More on that soon. till then....
Motion Sickness is something we have had in our family. My mother had it when she was small... i have had it ever since i started school... and now our 16 month old son Pradyot has it.. So what do we do. well. for as long as I can remember Maa always kept a supply of anti-vomiting pills in her purse. and whenever the roads became twisty she would pop in one and give me a half to save our day. however when Pradyot showed up with signs of motion sickness i looked for options that would not involve pills. because around here we don't like to resort to drugs unless it is absolutely necessary. so i asked my friends and relatives if they have faced a similar situation and how they dealt with it. my sister said that once inside the car/bus she tries to keep her daughter comfortable by taking off her outer wear. my aunt said that sucking on something sour might help. and on the internet i read that candied ginger helps... so that was that... the next thing i did was to take off Pradyot's jacket as soon as we were in the care and hand him a lollipop.... that hepled. immensely. every time we were headed for a drive i would let Pradyot pick up a lollipop. the first few times i limited his choice of flavours to sour-apple and oranges. but then i realized all of them are tangy enough.. so now i keep a supply of lollipops in the car and simply let him choose from the packet once we are inside... (making the choice also keeps him engaged for a while :)). but then he gets bored of things too fast. so for back up, i have started carrying apples with me these days. apples that are slightly sour.. that helps too. moreover it feels much better to hand him apples than candies. so now we have options and we are both doing good. and as for me i have started carrying ginger cookies coated with lemon marmalade and honey whenever we are headed for a long drive. these definitely help. also its nice to munch on something warm and gingery every once in a while....
Did you ever have to deal with motion sickness ? If so, what did you do? I'll love to hear.
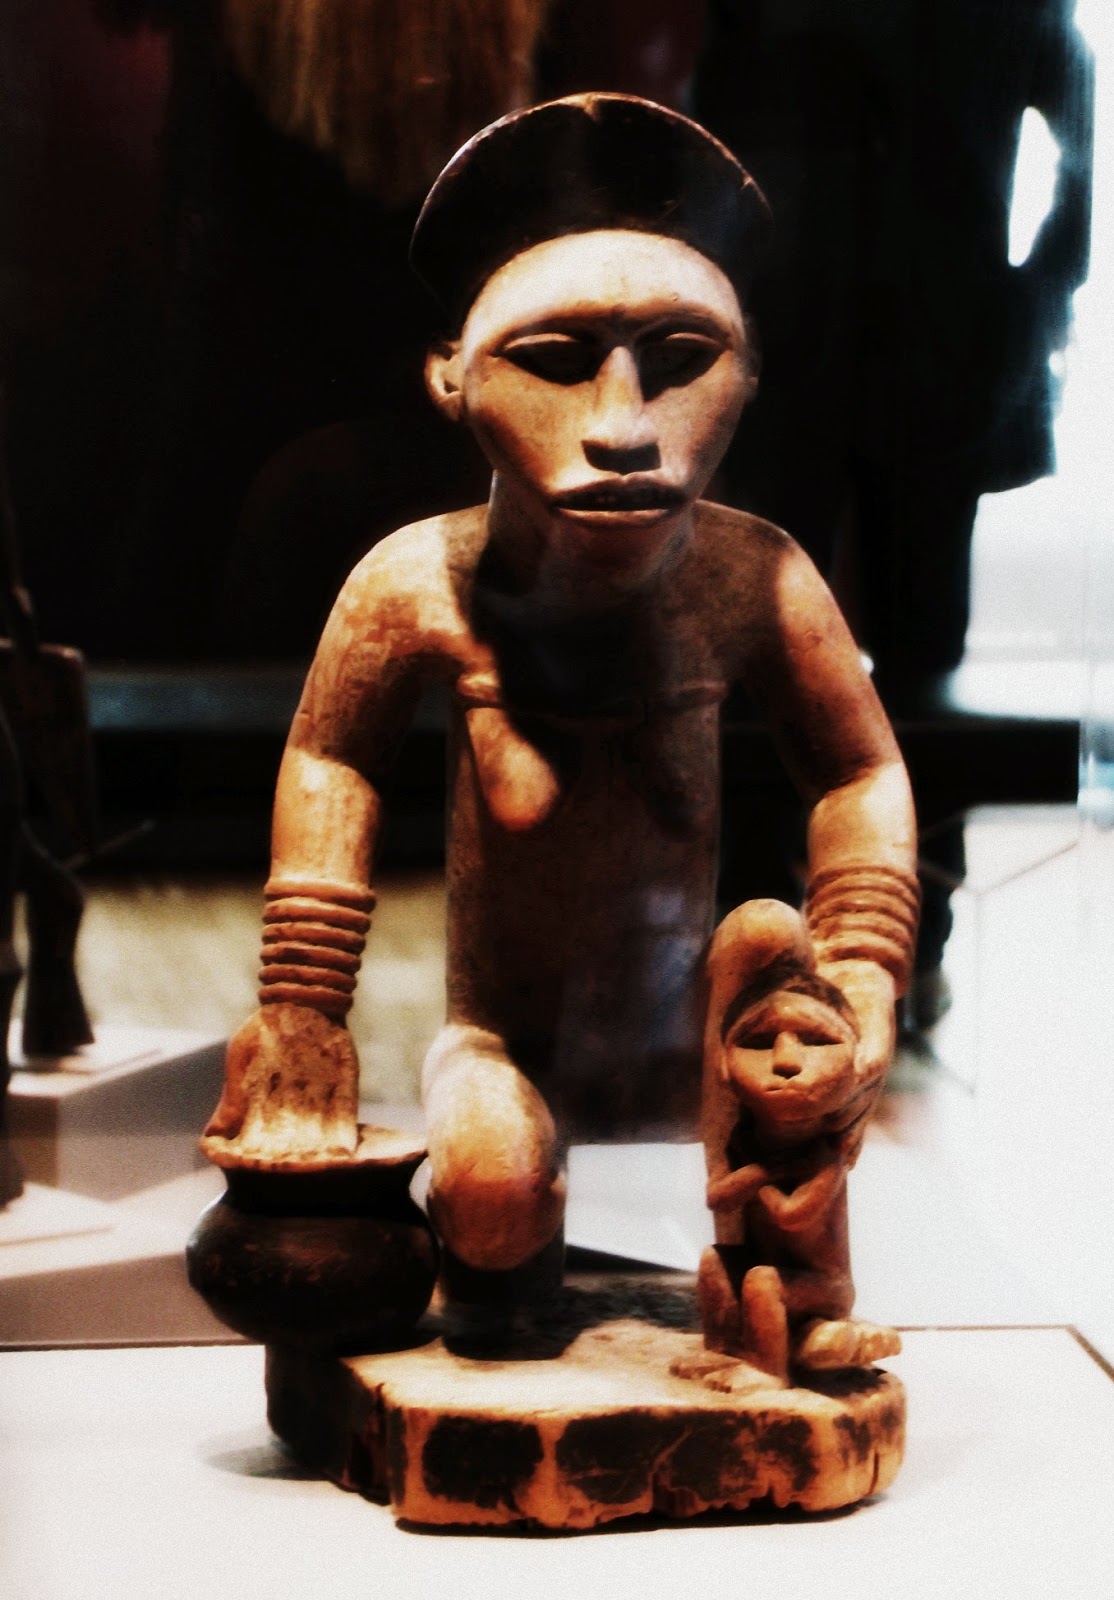
Photograph above is of Kneeling female figure with a medicine bowl and child that is on display in Yale University Art Galler, New Haven, CT.Nishi took it when we were there over the weekend.
Over the President's day weekend we visited the Beardsley Zoo in Bridgeport, Connecticut. Of course we had planned the trip with Pradyot in mind... but as it turned out, his dad and I enjoyed it as much. The animal kingdom is so darn fascinating !! so i thought of sharing some of our better clicks from the day...
^^ the peafowl that greeted us outside the Rainforest building
^^ Blue-sapphire Poison Dart Frog that i had only seen in photographs before..
^^ Scarlet Ibis..
^^ Golden Lion Tamarin that seemed like the most friendly creature around..
^^ Emerald Tree Boa
^^AmurTiger that we could not get enough of. Nishi and i kept shooting it every-which-way... but we just could not capture its magnanimity with our not-so-versatile-digital...
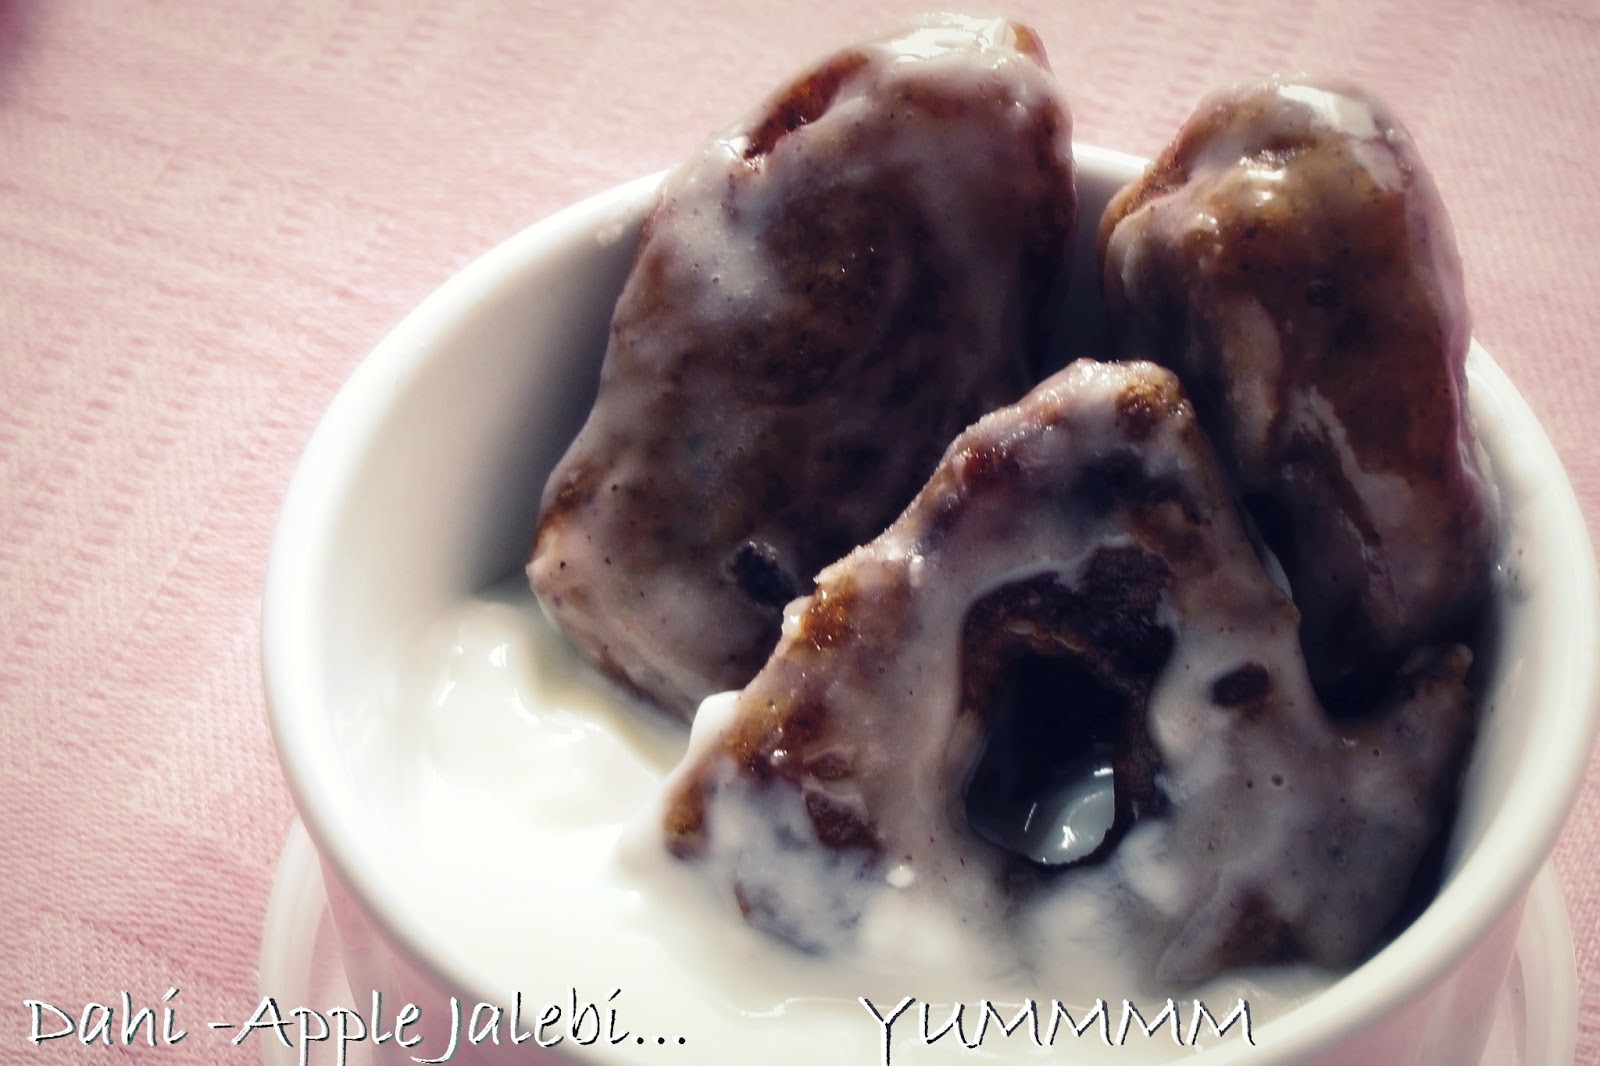
So for breakfast today we had Apple Jalebi with Yogurt. Weird ?? Not really. the combo is actually very tasty. I had jalebi or fritters with yogurt or Dahi Jalebi as they called it for the first time in Allahabad.. they served it for breakfast in our hostel mess. at first I was a little skeptical about how that would taste... but once i had it... i kept going back to the mess very Sunday for the rest of that month. i say, 'that month' because, well, our mess menu changed every month according to the likings of the rotating mess managers... so that was there on the menu for that month and again came back when we became the mess managers :)
needless to say, that for memories sake, to this day, Nishi and I relish Dahi Jabi. however this morning i decided to punch in a little more health to the combo. so i substituted some of the flour with finger millet and instead of making mere jalebis i adapted the recipe of apple jalebi from Manjula's Kitchen. and just to make life a little simple, instead of making the usual sugar syrup in which the fritters are dipped I coated them with a sugar-cinnamon glaze before serving with beaten yogurt... and the result was YUMMMM.... a good beginning to a working day.
ingredients for the fritters 1 1/2 apples peeled and sliced them in thin rings 1/8 cup finger millet/ragi 1/3 cup minus 1/8 cup all purpose flour 1/2 teaspoon dry yeast 1/2 teaspoon sugar 1 1/2 teaspoon oil pinch of baking soda
Oil to fry
for the glaze
1 cup confectioners sugar
2 tablespoons apple juice
1 tablespoon milk
2 teaspoons ground cinnamon
what i did.
I began by dissolving the yeast and sugar in 1/8 cup of warm water and allowing it sit until the mixture became foamy. meanwhile i mixed the flours, sifted them and added oil into the mixture. once the yeast solution was ready, i added that to the flour mixture and adding water a little at a time formed a pancake like batter with it. I then set the batter aside and let it rest in a warm place till it rose about 7-10 %. it took about an hour for the batter to ferment and become slightly lacy. while the batter fermented, i prepared the glaze by simply mixing the listed ingredients. once the batter was ready, I poured oil in a medium sized saucepan to reach a depth of 1 inch and heated it over medium heat. To check if the oil was ready, I put one drop of the batter in the oil. Once the batter came up without changing color right away I knew that I could start frying my fritters.
For the Fritters, I coated the apple rings with the prepared batter in batches and dropped them into the oil and fried them until the batter was golden brown. Then transferred them to a paper towel to drain of the extra oil. Finally i dipped them into the glaze, coating both sides and let the glaze settle on the fritters before serving them with beaten yogurt.
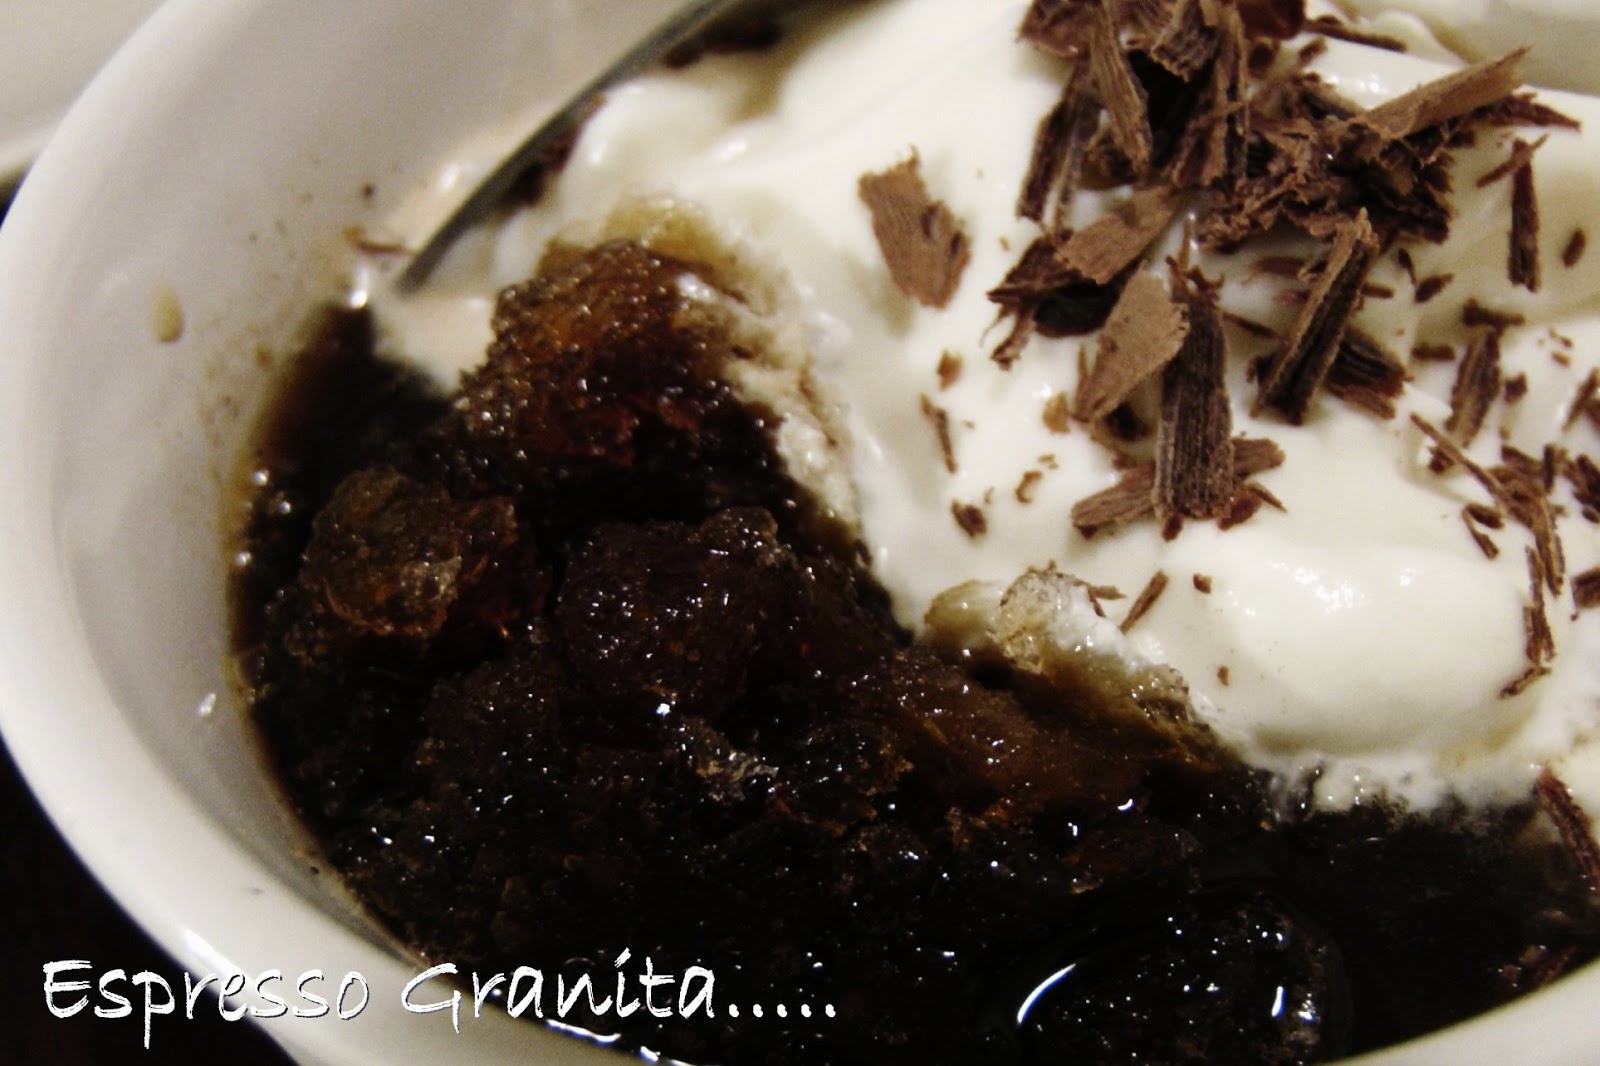
In spite of many a lofty plans, this 14th of Feb, all I ended cooking up for dinner was our regular pizza and Espresso Granita from Lucinda's Rustic Italian Kitchen. In fact I did not even make the pizza. i just got the dough ready and Nishi topped it, as he always does and got the dinner ready while i was hanging out with Pradyot. and it was only after our little boy fell asleep that i felt a compulsive desire to make something sweet to mark our love and friendship of ten years. i flipped through the recipe books that were on the kitchen counter and decided on Espresso Granita as the dessert for the evening. why Granita on a cold chilly night you ask. well, because we are crazy like that. also, once upon a time... several moons ago, it was coffee that had tied a strong silent bond between the two of us.... so celebrating with coffee always seems befitting no matter which form it is in.
I followed the recipe from Lucinda's Rustic Italian Kitchen word to word, just sizing it down to serve two. and this is how it went.
ingredients.
2/3 cup freshly made espresso
1/3 cup water
1 tablespoon sugar
1/8 cup sugar
1/2 cup heavy cream
shaved bittersweet chocolate
what i did.
while the coffee was still warm, i stirred in the sugar until it dissolved and next added the water. i then poured the mixture into my 9.25 x 5.25 x 2.75 inch bread loaf pan and placed the pan in the freezer. after 45 minutes, when a thin layer of ice had gathered on the surface, i racked it with a fork to dislodge and distribute the ice crystals... and kept repeating the raking-dislodging-redistributing business every 30 minutes for the next 2 hours to form a granular texture.
in the meantime, Nishi whipped the cream and remaining sugar in the mixture until it formed soft peaks.
finally we scooped out the granita into two ramekins, topped it with a dollop of whipped cream and shaved chocolate and dug into it right away.... hmm... that felt good... slurp ... slurp...........
A few days back i happened to stumble upon the cooking event "Flavors of Italy for the month of February" at Divya's Culinary Journey and got all charged up. you see other than pizza, pasta, lasagna, gelato and biscotti... my knowledge about Italian cuisine is limited. so i saw this event as an opportunity to explore the unknown terrains.. and though i consult the internet for every new dish i try... for this event i decided to cook from the book. that led me to the culinary aisle of our local library where amongst all other books on Italian culinary i picked up Lucinda's Rustic Italian Kitchen. well my choice of the book was determined by two things...
one. it wasn't as fat as most others in the rack...
two. because somehow rustic appeals to me much more than fine dining...
The book with its little introductory anecdotes before each recipe is a nice read by itself. the style of cooking she mentions is very simple and non-intimidating. so after a quick browse... i decided on a few dishes that i would like to try.. and Marsala Wine Taralli happened to be one of the firsts.
According to the chef Lucinda Scala Quinn, Taralli were typically a savory cookies which varied from region to region and were often enjoyed with wine. Apparently some recipes of Taralli called for briefly boiling the dough before baking them. However the recipe in the book is simple and straight-forward and only involves kneading the dough, looping the dough and baking them. She says that her recipe was passed down to her from her Great Aunt Lina (Carolina Scala)... and this recipe yields taralli which are quite different from the ones she had had in Italy.
While I tried to stay faithful to the book as much as possible there were some changes i made here and there. the chef uses eggs in her recipe. but since we are not too fond of the eggy smell so i made an eggless version. also because I could not get Marsala wine, I used the cooking Marsala wine that was available at the neighborhood grocery store. I guess the substitutions might have meddled with the authentic taste of these cookies... but since i have not tasted the real thing.. i cannot say. we however liked the version we had in hand. in fact Nishi and i popped in a few even before they were glazed because they were just so good.. not too sweet... not too hard.. something similar in taste to Starbucks madeleine..but slightly harder in texture. the other liberty that I took with the recipe was in shaping my loops like hearts, x's and o's.. but then it is the 14th of Feb. you can't blame me for that.
in the book, the chef mentions that these cookies were her dad's favorite and he recalls them with a thin lemon glaze which she hadn't found in her Grandmother's files but had incorporated in her recipe. however since i realized late at night that i had run out of lemons so i created two alternative glazes both of which tasted good... but as i said... these cookies are lovely just by themselves...
paste of 1 tablespoon cornstarch + 2 tablespoon water (substitute for 1 egg)
for the Marsala wine -honey glaze :
1/2 cup confectioners sugar
2 tablespoons of Marsala cooking wine
1 1/2 tablespoon of honey
for the white grape juice glaze :
1/8 cup confectioners sugar
2 teaspoons white grape juice
1 teaspoon of milk
what i did :
I started by preheating the oven to 375 degrees F and lining 2 baking trays with parchment paper.
For the cookies I combined the flour, baking powder and salt and sifted the mixture. In a separate bowl I whisked together the sugar, wine, olive oil and cornstarch paste, adding them in the order mentioned. I
then i folded in the flour mixture until well combined and kneaded it slightly until the dough was easy to handle and medium-soft.*(see my notes).
Next, using my hands I rolled the dough into cigar-like rolls and shaped them into heart-loops and x-o s like this....
then placed them on the prepared baking trays and baked the cookies until slightly golden, about 17 to 20 minutes.
For both the glazes i simply whisked the ingredients together. and after cooling the cookies overnight, i dipped them into the glaze coating both sides and let the glaze settle on the cookies in the refrigerator for about 6 hours. **(see my notes).
notes:
*initially i had sized down all the ingredients to 2/3 of what the recipe in the book said. by that calculation i started off with 2 cups of all purpose flour and the rest of the ingredients as stated above. but while kneading i felt that the dough was becoming tough while 1/8 cup of the sifted ingredients were still to be kneaded in. so i left it like that. while writing down the recipe i realized that while i had sized down the quantity of all-purpose flour I had not done the same for the rest of the dry ingredients. if you try this recipe you might want to size those down slightly.
**as you can see here, the original recipe says that the icing should be of the consistency of thick whipping cream. since I had used only 1/2 cup instead of 1 cup sugar mine was not so thick. however we liked the mild sweetness that it rendered.
i should also mention here that my choice of alternative glazes was determined by thispiece on the internet that i found while looking for non-alcoholic substitutes for Marsala Wine.
so that was that.... if you stop by do fill me with your comments and thoughts. I'll love to hear.. till then


.jpg)


.JPG)


